Ice Dam Prevention: Protect Your Roof This Winter
Quick answer
Ice dams are best prevented by reducing attic heat loss, keeping insulation and air sealing continuous, and maintaining clear ventilation paths. Heat cables and roof rakes can help manage symptoms but do not fix the underlying heat-flow problem.
Common questions
- What causes ice dams?
- Warm attic areas melt snow on the roof, then water refreezes at colder eaves. The cycle is driven by heat loss, uneven roof temperatures, and freezing outdoor conditions.
- What is the safest first step during an ice dam?
- Avoid chopping the roof. Reduce interior damage, clear snow from the ground with a roof rake when safe, and call a pro for severe ice, high roofs, or active leaks.
Source note: Reviewed July 2026 against the article guidance and common roofing trade practice; roof condition, local code, warranty terms, and weather exposure control final decisions.
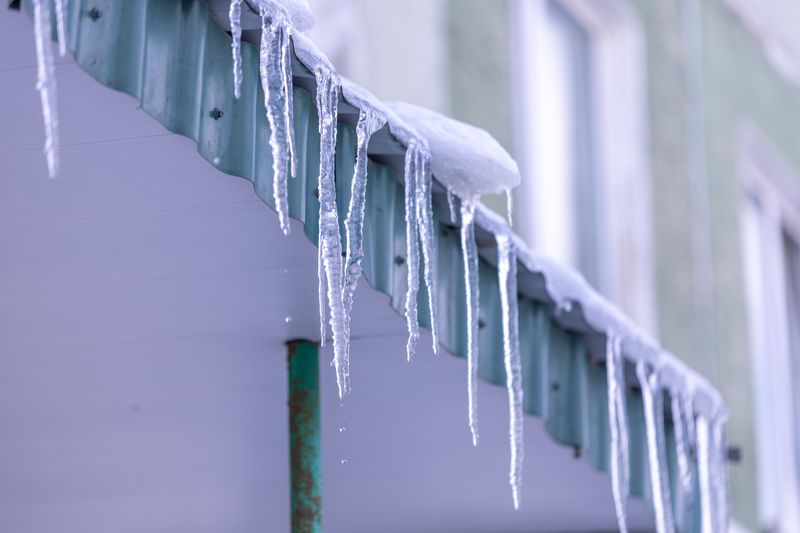
Ice dams are one of the most destructive winter roof problems — and one of the most preventable. If you’ve ever seen a thick ridge of ice hanging off the edge of a roof with icicles dangling below, you’ve seen an ice dam. Behind that ice, water is often backing up under shingles and into the structure of the home.
Understanding why ice dams form is the key to stopping them.
What Is an Ice Dam?
An ice dam is a ridge of ice that forms at the edge of a roof. It blocks meltwater from draining off the roof, forcing water to back up under shingles where it can leak into the attic, walls, and living spaces.
Ice dams cause:
- Water stains and damage to ceilings and walls
- Soaked and ruined insulation
- Mold and mildew growth
- Damaged gutters and fascia
- Lifted and cracked shingles
Why Ice Dams Form
The root cause is uneven roof temperature — specifically, a warm upper roof and a cold lower roof edge.
Here’s the cycle:
- Snow accumulates on the roof.
- Heat escaping from the warm living spaces below warms the upper portion of the roof deck.
- Snow on the warm section melts and water runs down toward the eaves.
- The eaves (roof overhang) are not heated from below — they stay at or below freezing.
- Meltwater refreezes when it hits the cold eave area, forming a dam of ice.
- More meltwater backs up behind the dam, pools, and seeps under shingles.
Key insight: The problem is not the snow or cold. It’s the temperature difference across the roof. A consistently cold roof — one where heat doesn’t escape unevenly — won’t form ice dams even with significant snow.
How to Prevent Ice Dams
There are two complementary strategies: keeping heat inside your home where it belongs, and ensuring uniform roof temperature through ventilation.
1. Air Seal the Attic Floor
Heat rises. Most heat loss into an attic is not through insulation — it’s through air leaks around:
- Light fixtures (especially recessed can lights)
- Attic hatches and pull-down stairs
- Plumbing and electrical penetrations
- Chimney chases
- HVAC ducts
Sealing these air leaks is the single most effective ice dam prevention measure. A can of spray foam and a few hours with an energy auditor can dramatically reduce heat flow into your attic. Spray foam sealant
2. Add Attic Insulation
After sealing air leaks, add insulation on the attic floor (not the roof deck — that traps heat in the rafters). Most cold-climate homes should have R-49 to R-60 in the attic floor.
Common insulation types for this application:
- Blown cellulose or fiberglass — easy to add over existing insulation
- Rigid foam board — good for areas where depth is limited
Browse blown-in insulation kits through major retailers
3. Ensure Proper Attic Ventilation
Even after air sealing and insulating, some heat reaches the attic. Ventilation keeps the attic — and roof deck — cold and even by continuously cycling in cold outside air.
Proper ventilation requires:
- Continuous soffit vents at the eaves for air intake
- Ridge vent or attic fans at the peak for exhaust
- An unobstructed airflow path from soffit to ridge
- Insulation baffles (rafter vents) to maintain the air channel above insulation
Rafter baffles / insulation baffles through major retailers
4. Install Ice and Water Shield
During roofing or re-roofing, self-adhering ice and water shield should be installed at the eaves. This rubberized membrane adheres to the roof deck and seals around nails, so even if an ice dam forms and water backs up, it can’t penetrate into the structure.
Cold-climate building codes typically require ice and water shield extending at least 24 inches inside the interior wall line — more in extreme climates.
Ice and water shield through major retailers
5. Install a Roof De-Icing Cable
Heat cables (also called heat tape) are resistive heating cables that run along the eaves in a zigzag pattern. They create a channel in the ice for meltwater to drain through.
They’re an active, temporary measure — not a permanent fix — but useful for problem areas while you address the root causes (air sealing and insulation). They consume electricity and should be used selectively.
roof heat cables
What to Do If You Already Have an Ice Dam
Immediate Options
Remove snow from the roof edge. A roof rake (available here through major retailers lets you pull snow off the lower few feet of the roof from the ground. Removing the snow source limits further ice formation.
Create a channel through the dam. Fill a nylon stocking with calcium chloride ice melt (not rock salt — it corrodes metal and damages plants). Lay it vertically across the ice dam, perpendicular to the roof edge. The calcium chloride melts a channel through the ice and allows water to drain.
Calcium chloride ice melt through major retailers
What NOT to Do
- Don’t chip at the ice with a hammer or axe. You will damage your shingles and possibly yourself.
- Don’t use rock salt on your roof. It corrodes metal gutters and flashings and kills plants where it drains.
- Don’t go on the roof in winter to remove ice. Icy roofs are extremely dangerous.
- Don’t use heat guns or open flame near your roof or attic insulation.
If Water Is Already Leaking Inside
Ice dam leaks can be difficult to stop mid-winter. The immediate priority:
- Remove as much snow from the roof edge as safely possible.
- Create a calcium chloride channel to give water a route off the roof.
- Inside the attic, push a screwdriver into the wet spot to give water a defined drip point and place a bucket below.
- Document the damage thoroughly with photos for a potential insurance claim.
Long-Term Solution Summary
Sustainable ice dam prevention requires addressing the root cause:
| Priority | Action | Impact |
|---|---|---|
| 1 (highest) | Air seal attic floor penetrations | Eliminates most heat loss into attic |
| 2 | Add attic floor insulation to R-49–R-60 | Reduces remaining conducted heat loss |
| 3 | Ensure proper soffit-to-ridge ventilation | Keeps roof deck cold and even |
| 4 | Install ice and water shield at eaves | Prevents water intrusion if dam forms |
| 5 | Install heat cables | Manages symptoms in problem spots |
Tackle them in order. Air sealing and insulation typically cost $500–$2,000 for an average attic and pay for themselves in energy savings in addition to preventing ice dams. Roof heat cables cost $50–$200 in materials but only manage symptoms, not causes.
Ice dams are almost entirely preventable with the right attic conditions. Invest in air sealing and insulation this year, and you’ll likely never deal with the problem again.
See Also
- Roof ventilation guide — proper soffit-to-ridge ventilation is the third pillar of ice dam prevention; learn how to check and improve yours
- Best roofing materials for cold climates — if you’re re-roofing, choose a material and installation approach built for winter performance
- How to fix a leaking roof — if an ice dam has already caused a leak, use this guide to manage it and minimize interior damage

Shingle Science Editorial Team
Independent trade-focused editorial team