Roof valley leaking? Diagnose the source before repair
Quick answer
A stain below a roof valley does not prove the valley is leaking. Record the weather pattern, trace the highest safely visible moisture, and have a qualified roofer distinguish blocked drainage, damaged covering, failed lining or flashing, wet decking, and an upstream entry point before setting the repair scope.
Common questions
- Why does my roof valley leak only in heavy rain?
- Heavy or wind-driven rain can expose a marginal drainage, lap, fastener, flashing, or roof-cover condition that lighter rain does not. It can also reveal an upstream wall, chimney, vent, or gutter problem. The timing narrows the investigation but does not prove the valley is the entry point.
- Can a leaking roof valley be repaired with sealant?
- Only a qualified roofer should decide that after identifying a specific, serviceable joint and checking product compatibility. Sealant cannot replace failed valley lining, corroded metal, damaged shingles or panels, incorrect laps, or deteriorated decking.
- How much does roof valley repair cost?
- There is no dependable price without a location and written scope. Cost depends on valley length, roof material and pitch, access, removal width, underlayment or metal replacement, deck damage, matching materials, permits, and interior work. Compare itemized local quotes rather than a national average.
Source note: Technical and safety guidance was checked October 14, 2026 against current GAF roof-leak guidance, GAF shingle application instructions, the 2024 International Residential Code, and OSHA residential fall-protection guidance. The installed roof manufacturer's current instructions and locally adopted requirements control the repair.
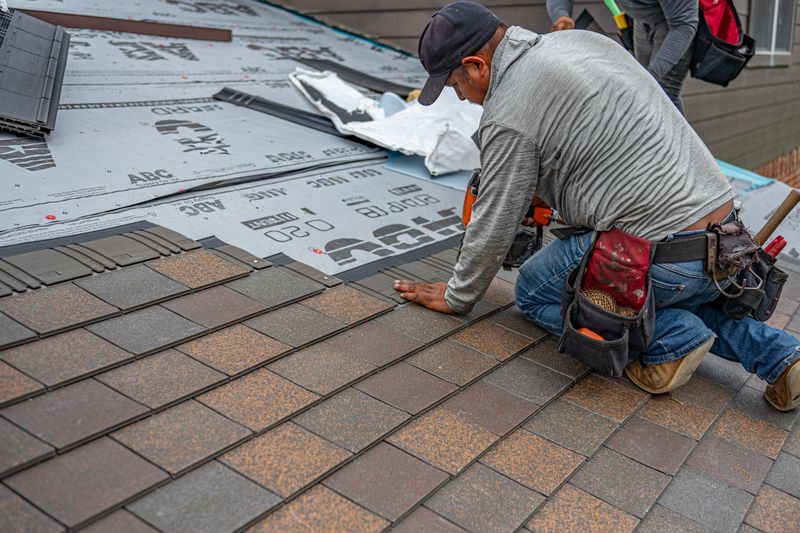
If your roof valley is leaking, do not assume the ceiling stain identifies the entry point. Water can enter at the valley, travel along underlayment, decking, framing, or insulation, and appear several feet away. The reverse is also possible: water from a chimney, wall, vent, damaged roof covering, or transition farther uphill can drain toward the valley and make it look guilty.
The useful decision is not “Which sealant should I buy?” It is which layer failed, how far damage extends, and what must be opened and rebuilt for a durable repair. Start with safe observations, protect the interior, and ask a qualified roofer to connect the proposed scope to evidence.
Make an active leak safe first
Keep people out of the affected area and arrange prompt professional help when water is near wiring, a light, an outlet, or an appliance; a ceiling is bulging or shedding material; framing looks sagged; or water is entering too quickly to contain from a dry floor.
If you can do so without standing beneath a swollen ceiling, move belongings and place a container below a drip. Photograph the room and damage for the contractor and insurer. Do not touch wet electrical equipment, enter an unsafe attic, or climb onto the roof to place a patch.
OSHA’s residential construction guidance treats roofing as fall-hazard work requiring planned protection for covered workers. A wet valley is also a concentrated drainage path, not a safe homeowner inspection route. Observe from the ground, a window, or a dry, stable interior location.
Is the valley actually the source?
Use the following clues to organize an inspection. None proves the cause by itself.
| Observation | What it may support | What else must be ruled out |
|---|---|---|
| Leak begins during intense or wind-driven rain but not light rain | A marginal lap, fastener, drainage path, sidewall, or valley detail | Wind-driven entry at a wall, chimney, vent, ridge, or damaged shingle uphill |
| Leaves, needles, sediment, moss, ice, or a visible obstruction collects in the valley | Slowed drainage or water being redirected sideways | Damage already hidden below the covering, and why debris repeatedly accumulates |
| Rust, a pinhole, open seam, displaced panel, cracked tile, or worn shingle is visible in the valley | A defect in the exposed covering or metal | Concealed lining, underlayment, fastener, and deck condition |
| Highest interior wet mark aligns with the valley | A valley assembly failure | Water traveling from a higher roof-to-wall, chimney, vent, ridge, or penetration detail |
| Staining continues uphill past the valley intersection | An upstream entry point | The valley may be receiving water but not admitting it |
| Water appears during a thaw or after ice buildup | Backup at an eave or valley, or an ice-related condition | Attic heat loss, ventilation, and other cold-weather moisture sources |
| Dampness occurs without rain or snowmelt | Condensation, plumbing, or mechanical moisture | A roof leak can coexist with a non-roof moisture problem |
GAF’s current roof-leak guidance identifies aging shingles, damaged flashing, clogged drainage, and ice dams as different possible causes. That is why a stain near a valley needs a water-path diagnosis, not a location-based guess. For a whole-roof tracing process, use our hidden roof leak detection guide.
How to document a leaking roof valley safely
1. Build a weather timeline
Record when dripping or staining starts and stops. Note rain duration and intensity, wind direction if known, snowmelt or freeze-thaw conditions, and whether the symptom appears immediately or after hours of wet weather.
Also note dry-weather plumbing, HVAC, or exhaust use. “Only during heavy rain from the west” is more useful to an estimator than “the valley leaks sometimes.”
2. Map the interior evidence
Photograph the entire room, then the stain close up with a ruler or another size reference. Measure its position from two fixed walls. If the surface is stable and dry enough to approach, painter’s tape at the stain edge can show whether it grows during the next event; do not press, puncture, or stand beneath a bulging ceiling.
3. Look from a safe attic position only
If there is a dry, boarded, well-lit access path, use a flashlight to look for the highest visible wet point, darkened decking, rusty fasteners, damp framing, compressed insulation, or a trail that continues uphill. Stay on a designed walkway and do not move wet insulation near wiring.
Stop if framing is concealed, footing is uncertain, heat or lighting is unsafe, or you encounter mold, suspect asbestos-containing material, pests, damaged wiring, or structural movement. A roofer may need selective opening to distinguish the entry point from the drip path.
4. Capture exterior context from the ground
Use binoculars or a zoom camera to photograph the full valley from its upper end to the eave. Include nearby chimneys, dormers, sidewalls, vents, roof additions, gutters, and downspouts. Visible debris or damage is a lead for professional inspection, not permission to climb or pull materials apart.
Do not run a random hose test. Uncontrolled testing can enlarge damage, enter through more than one detail, and produce a misleading result. If testing is needed, the contractor should plan isolated stages, interior observation, weather conditions, and fall protection.
What may have failed inside the valley assembly
Debris or drainage restriction
Leaves and sediment can slow runoff, hold moisture, or redirect water under an edge. Removing the obstruction may restore flow, but it does not prove that the covering, metal, lining, and deck below remain sound. Ask why debris collected and whether staining or corrosion requires further opening.
Damaged roof covering
Cracked, displaced, eroded, or badly cut shingles; broken tiles; open metal-panel laps; and poorly placed fasteners can admit water. The contractor should identify the installed product and show how the repair will restore its required laps, fastening, and transitions on both roof planes.
Failed lining, underlayment, or metal
A valley may be open, closed-cut, woven, or built with another material-specific detail. Concealed layers matter even when exposed materials look acceptable. Corroded metal, a punctured or poorly lapped lining, incompatible materials, or an incorrect transition can require removal on both sides of the valley.
The 2024 International Residential Code provides permitted asphalt-shingle valley-lining approaches and says roof coverings and valley linings are installed according to the applicable provisions and manufacturer instructions. Your jurisdiction may use another edition or amendments. The roofer should identify the installed roof product, its current valley detail, and the locally adopted requirement rather than prescribe one universal assembly.
Deteriorated decking or framing
Soft, delaminated, stained, or sagged decking changes the scope. Surface work cannot restore a damaged substrate. The proposal should state how hidden damage will be documented, priced, authorized, and replaced after the valley is opened.
An upstream source
A chimney, roof-to-wall joint, vent, ridge, fastener, or damaged field covering may release water that travels into or beside the valley. Repair the actual entry point and any resulting valley damage. Our roof flashing guide explains the surrounding transitions a contractor may need to inspect.
Match the repair scope to the evidence
| Documented condition | Scope to discuss | What the quote should prove |
|---|---|---|
| Debris obstructs an otherwise serviceable, undamaged assembly | Professional cleaning and detailed inspection | Drainage is restored and no covering, lining, metal, or deck defect remains |
| One defined, accessible component is damaged and surrounding layers are serviceable | Targeted material repair | The replacement can be integrated with required laps, fasteners, and compatible materials |
| Metal, lining, or underlayment is corroded, punctured, badly lapped, or repeatedly patched | Valley rebuild over a documented length | Removal width, deck inspection, new lining or metal, roof-cover restoration, and transitions are specified |
| Decking or framing is wet, soft, delaminated, or sagging | Structural and moisture scope before closure | Who evaluates and replaces damaged material, including change-order limits and photos |
| Entry begins at an uphill chimney, wall, vent, or roof defect | Repair the upstream detail plus affected valley layers | The traced water path connects the defect to the interior evidence |
| Several valleys or broad roof areas are failing near the end of service life | Compare repair with reroofing | Remaining roof condition, matching constraints, warranties, and total scope support the recommendation |
A bead of roof cement or sealant is not a universal valley repair. It may conceal the route, divert water beneath adjacent materials, conflict with the roof product, or make later diagnosis harder. A limited compatible joint repair should name the exact joint and product instruction; missing or failed layers need mechanical reconstruction.
Why roof valley repair cost varies
Roof valley repair cost cannot be reduced to a trustworthy national number. Labor rates, material availability, permit rules, and roofing practices vary by location, while two visually similar leaks may require completely different work.
Ask bidders to itemize these cost drivers:
- Valley type, length, roof covering, slope, height, and access plan
- Removal width on both roof planes and matching-material availability
- Underlayment, leak barrier, metal, fasteners, and transitions included
- Decking or framing allowances and unit prices for hidden damage
- Gutters, siding, chimney, wall, vent, or interior work excluded or included
- Fall protection, staging, disposal, cleanup, permits, and inspections
- Manufacturer, material, and workmanship warranty effects
- Emergency protection or drying work separate from permanent repair
Use our roof repair cost guide to compare broader repair categories, but make the decision from local written scopes rather than an unverified price range.
Roof valley quote checklist
Give every roofer the same photos, measurements, weather timeline, and repair history. Ask each proposal to answer:
- Where is the suspected entry point, and what evidence supports it?
- Which upstream sources and non-roof moisture causes were ruled out?
- What valley type and roof product are installed?
- Which current manufacturer detail and locally adopted requirement govern the repair?
- How much roofing will be removed on each side, and why?
- Will the lining, underlayment, flashing, fasteners, and deck be inspected and photographed?
- How will hidden damage or unavailable matching material change the price?
- Who owns related masonry, siding, gutter, structural, electrical, drying, or interior work?
- What workmanship warranty applies, and what is excluded?
- What happens if the documented repair does not stop the leak?
If bids disagree, compare their diagnoses before comparing totals. A cheap surface patch and a full valley rebuild are not competing prices for the same scope.
The useful next step
Document the next rain event from safe locations, map the highest visible moisture, and send the same evidence to qualified local roofers. Ask for photographs before, during, and after opening the work area, plus a written explanation of why the selected scope addresses the entry route.
For leaks whose source is still uncertain, start with the broader leaking-roof guide and keep the valley diagnosis separate. The durable outcome is not a valley that looks patched; it is a roof system that sheds water correctly from the verified source to the eave.

Shingle Science Editorial Team
Independent trade-focused editorial team