Roof moss removal and prevention: a complete guide
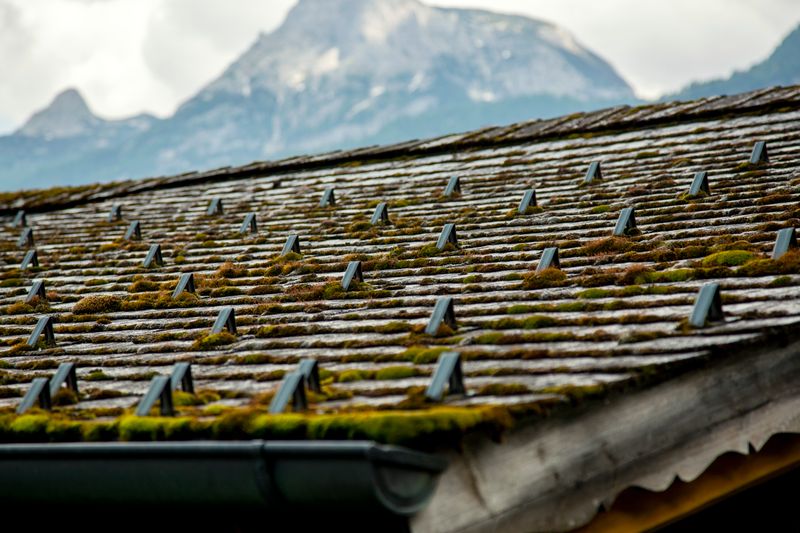
If you’ve noticed green patches spreading across your roof shingles, you’re looking at moss — and it’s not a cosmetic issue. Moss root systems anchor into the granule surface of asphalt shingles, pry them apart as they grow, and create channels that funnel water beneath the shingle layer. Left unchecked, moss can cut a roof’s service life in half.
This guide covers why moss grows on roofs, how to remove it without damaging your shingles, and what it takes to keep it from coming back.
Why moss grows on roofs
Moss thrives in three conditions: moisture, shade, and organic debris. If your roof has areas that stay damp for extended periods — typically north-facing slopes, sections under tree canopy, or low-pitch sections where water drains slowly — it’s a candidate for moss colonization.
Moss doesn’t grow from seeds the way plants do. It spreads via spores carried by wind, and it establishes fastest in the gaps between shingle tabs where organic material (leaf litter, dust, pollen) collects and stays moist. Once established, the moss acts like a sponge, holding water against the shingle surface for days after rain.
That constant moisture is what causes the real damage. Asphalt shingles are designed to shed water, not hold it. Prolonged moisture exposure causes the asphalt mat to deteriorate, the granules to loosen, and the shingle to curl and crack. In freezing climates, the moss holds water that freezes and expands, literally prying shingle layers apart.
Is roof moss a sign you need a new roof?
Not necessarily — but it depends on how long the moss has been there and what damage it’s caused.
- If moss is surface-level and shingles are still lying flat with intact granules, removal and prevention will solve the problem
- If shingles are curling, cracking, or losing granules in moss-affected areas, those sections may need replacement
- If moss coverage is extensive and the roof is over 15 years old, a full replacement may be more cost-effective than spot repairs
If you’re unsure about the condition beneath the moss, a professional inspection is the best starting point. Check our guide on signs you need a new roof for a detailed assessment framework.
How to remove roof moss (without destroying your shingles)
This is where most homeowners go wrong. The instinct is to power-wash or scrape the moss off aggressively — both of which will cause more damage than the moss itself.
What NOT to do
- Do not pressure wash your roof. Pressure washing at any setting that removes moss will also strip granules from asphalt shingles, voiding the manufacturer’s warranty and dramatically shortening the roof’s life
- Do not scrape moss with a stiff brush or putty knife. Mechanical removal pulls granules away with the moss roots
- Do not use bleach at full concentration. Undiluted sodium hypochlorite corrodes metal flashing, damages shingle binder, and kills surrounding vegetation when it runs off the roof
The correct removal process
Step 1: Apply a moss killer. Choose a product specifically formulated for roof moss. Wet & Forget Moss Remover is a widely used option that kills moss over time without aggressive chemicals. For faster results, Spray & Forget is another effective option.
Apply the moss killer according to the product directions — typically this involves spraying the affected areas on a dry, calm day when no rain is expected for at least 24 hours.
Step 2: Wait. Moss killers work gradually. Most products require 2–4 weeks for the moss to die completely. You’ll know it’s dead when it turns brown or gray and dries out.
Step 3: Gently remove dead moss. Once the moss is dead, use a soft-bristle brush to gently sweep it away, working down the slope of the roof — never upward, which would lift shingle tabs. A long-handled roof brush lets you work from a ladder without getting on the roof itself.
Step 4: Rinse with low-pressure water. A standard garden hose (no nozzle) run from the ridge down will wash away the remaining dead material without damaging shingles.
Step 5: Inspect exposed shingles. After removal, check the areas where moss was growing for granule loss, cracking, or curling. If damage is visible, those shingles need replacement.
Moss removal cost: DIY vs professional
| Approach | Typical Cost | Best For |
|---|---|---|
| DIY chemical treatment | $30–$80 (materials) | Light to moderate moss, single-story home, comfortable on ladder |
| Professional moss removal | $300–$800 | Heavy moss growth, two-story home, roof with steep pitch |
| Professional removal + prevention treatment | $500–$1,200 | Recurring moss problem, full roof treatment |
| Moss removal + shingle repair | $600–$2,000+ | Moss has caused visible shingle damage |
If your roof pitch is steeper than 6/12 or you’re not comfortable working at height, professional removal is the safer option. Falls from roofs are one of the most common serious household injuries. See our roof fall protection guide for safety equipment recommendations if you choose the DIY route.
How to prevent moss from coming back
Removing moss once is only half the job. Without prevention, it will return — usually within 12–18 months in favorable conditions.
Trim overhanging branches
Sunlight is the single most effective moss inhibitor. If tree branches shade portions of your roof, trim them back to allow at least 4–6 hours of direct sunlight per day on previously shaded areas. This is the highest-impact prevention step you can take.
Install zinc or copper strips
When rainwater flows over zinc or copper metal, it picks up trace amounts of the metal ions that are toxic to moss, algae, and lichen. Installing a strip of zinc or copper flashing near the ridge creates a continuous zone of moss inhibition on the slope below.
- Zinc ridge strips are the most common DIY option
- Installation involves nailing the strip under the ridge cap shingles, exposing approximately 2 inches of metal
- Effective range extends roughly 10–15 feet down-slope from the strip
- For long slopes, additional strips can be installed at mid-roof
Apply preventive treatments
After moss removal, apply a preventive treatment annually in early spring:
- Zinc sulfate powder can be applied along the ridge — rain dissolves it and distributes it across the roof surface
- Copper sulfate-based sprays work similarly and provide broader coverage
- Eco-friendly options like Wet & Forget can be used preventively at half the treatment concentration
Keep the roof clear of debris
Organic debris — leaves, pine needles, twigs — creates the seedbed for moss spores. Clear debris from the roof surface and gutters at least twice per year (spring and fall). If your property has heavy tree coverage, quarterly clearing may be necessary.
Also make sure gutters are functioning properly. Clogged or overflowing gutters keep the lower edges of the roof constantly damp, creating ideal moss conditions along eaves and in valleys. Our guide to gutter guards covers options for reducing debris accumulation.
Improve attic ventilation
Poor attic ventilation traps warm, moist air beneath the roof deck. In humid climates, this moisture can condense on the underside of the sheathing and contribute to conditions that favor moss growth on the exterior surface. If your attic feels damp or has visible condensation, improving ventilation can help. See our roof ventilation guide for a full breakdown.
Does homeowners insurance cover moss damage?
Generally, no. Most homeowners insurance policies classify moss damage as a maintenance issue rather than a covered peril. This means:
- The cost of moss removal is almost always out-of-pocket
- Damage caused by long-term moss growth (rot, structural deterioration) is typically excluded
- If moss-related water infiltration leads to sudden interior damage during a storm, the storm damage may be covered, but the pre-existing moss damage would not be
The exception is if you can demonstrate that the moss growth resulted from a covered event — for example, storm damage to a tree that subsequently shaded the roof in a new way. But in practice, this is difficult to prove and rarely successful.
The best approach is proactive maintenance. Removing moss early and keeping it from returning is significantly cheaper than dealing with the structural consequences of ignoring it. For more on what is and isn’t covered, see our roof insurance claim guide.
Moss vs algae vs lichen: what’s on your roof?
Not everything green on a roof is moss. The treatment approach differs depending on what’s actually growing:
- Moss — thick, cushion-like growth with visible stems and leaves. Grows in clumps, holds significant water. Requires the removal process described above.
- Algae (Gloeocapsa magma) — appears as dark black or green streaks running down the roof slope. Doesn’t hold water the way moss does but causes granule discoloration. Treatable with the same chemical products, but less structurally damaging than moss.
- Lichen — flat, crust-like growth that bonds tightly to the shingle surface. Harder to remove than moss because the growth is fused with the granules. Chemical treatments work but take longer. Mechanical removal of lichen almost always damages the shingle surface beneath.
If you’re unsure what’s growing on your roof, a professional inspection can identify it and recommend the appropriate treatment.
Key takeaways
- Moss on a roof is a structural threat, not a cosmetic issue — it traps moisture, lifts shingles, and accelerates deterioration
- Never pressure wash or aggressively scrape moss from shingles — chemical treatment followed by gentle removal is the safe approach
- Prevention is essential: trim branches for sunlight, install zinc or copper strips, and apply annual preventive treatments
- Insurance typically does not cover moss damage, making proactive maintenance the only cost-effective strategy
- If moss has caused visible shingle damage, those sections need repair or replacement — the moss itself is a symptom of conditions that will keep causing problems until addressed
If your roof has significant moss coverage and is more than 12–15 years old, it’s worth getting a professional assessment before investing in removal. In some cases, the moss is a symptom of a roof nearing end of life, and removal costs can be better directed toward a full replacement. Check our guide on how long a roof lasts for lifespan benchmarks by material type.

Shingle Science Editorial Team
Independent trade-focused editorial team