How to prepare your roof for hurricane season
Hurricane season officially begins June 1 and runs through November 30. For homeowners in Florida, the Gulf Coast, the Carolinas, and the mid-Atlantic, that six-month window is when a single storm can turn a manageable roof into a catastrophic problem. The difference between a roof that survives a Cat 3 and one that doesn’t often comes down to pre-season preparation — not just the quality of the materials installed when the roof was built.
This guide walks you through a systematic pre-season checklist, the repairs worth prioritizing, and what to do when a storm is actually on its way.
Why your roof is the highest-risk structure on your property
During a hurricane, wind doesn’t just blow over your roof — it creates upward pressure beneath it. As wind accelerates over the ridge, it generates negative pressure (suction) on the leeward slope. If your roof deck connection is weak, or if shingles and flashing have degraded, that suction can lift sections of roofing in seconds.
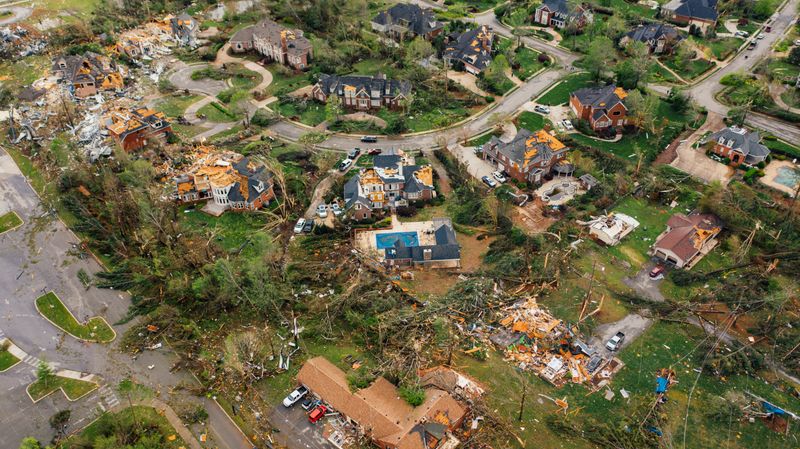
Water infiltration follows quickly after. Once a roof is breached, interior damage compounds rapidly: insulation, drywall, flooring, and personal property all become losses. FEMA data consistently shows that roof failure is the leading cause of total loss in residential hurricane damage.
The good news: most of the vulnerabilities that lead to roof failure are identifiable and fixable well before storm season.
Pre-season inspection checklist
Complete this inspection by mid-May, before the season begins. You can do most of this from the ground with binoculars, but a close-up inspection from a ladder adds significant value.
From the ground
- Look along each slope for missing, lifting, or curling shingles
- Check for shingles where the granule surface has worn through to the mat (they’ll look darker and smoother)
- Inspect gutters for sagging, detached sections, or visible corrosion
- Look at all visible roof edges and drip edge flashing for proper alignment
- Check the fascia and soffit for rot, gaps, or loose sections — wind exploits these openings
From a ladder (or the roof if you’re comfortable doing so safely)
- Press on shingles near ridges and edges — they should feel firm, not spongy
- Check all pipe boots, vent flashing, and chimney step flashing for cracked caulk or gaps
- Look at ridge cap shingles — these are often the first to lift in high winds
- Inspect where any skylights meet the roof surface
- Check the condition of sealant around any roof penetrations
From inside the attic
- Look for daylight penetrating through the roof deck — any visible light means gaps exist
- Check for water stains or active moisture on the rafters and sheathing
- Inspect the ridge board and sheathing for signs of rot or delamination
Repairs to prioritize before June 1
Not every roof deficiency needs to be addressed before hurricane season — but some absolutely do.
Replace missing or severely damaged shingles. A missing shingle is an unprotected opening. Wind gets under adjacent shingles and the damage cascades. Even a single missing shingle in a poorly positioned location can let enough water in to damage ceilings during a heavy rain event.
Re-seal all roof penetrations. Pipe boots, vent flashing, chimney step flashing, and skylight perimeters are the most common points of water infiltration. A tube of roofing-grade sealant applied to any cracked or dried-out caulk can prevent significant damage. Flex Seal Liquid Rubber is a popular DIY option for sealing around vents and flashings without extensive tearout.
Secure loose ridge caps. Ridge caps are exposed to wind uplift from both sides. If any feel soft or have visible lifting edges, resecure them with roofing nails and apply sealant under the lifted edges. For more extensive damage, replacing the ridge cap before season is worth the cost.
Reattach or replace drooping gutters. A gutter section that has pulled away from the fascia will detach completely in a storm — and it can damage the fascia and soffit as it goes. Gutters should be tight against the fascia and sloped properly toward downspouts.
Fix any attic ventilation gaps. Soffit vents and ridge vents are wind-driven rain entry points if screens are torn or vents are improperly installed. Secure any loose vent covers and replace damaged screen inserts.
Reinforcing vulnerable areas
Beyond basic repairs, several upgrades provide meaningful protection against hurricane-force winds.
Hurricane straps and clips
If you live in a high-risk hurricane zone and your home is more than 20 years old, it may pre-date modern building codes that require hurricane straps connecting the roof structure to the wall framing. A licensed contractor can inspect for these and add them where missing — this is one of the highest-value structural improvements you can make in hurricane-prone areas.
Sealed roof deck
One of the most effective hurricane upgrades available is a sealed roof deck — applying a self-adhering underlayment directly to the roof sheathing before installing new shingles. Products like Grace Ice & Water Shield create a waterproof bond to the deck that prevents water infiltration even if shingles are torn away. This is a renovation-level upgrade that applies when you’re replacing a roof, but worth knowing about if your roof is nearing end of life before a re-roof.
Wind-rated and impact-resistant shingles
Standard architectural shingles are typically rated to 110 mph. Wind speeds in a Cat 2 hurricane regularly exceed that. If you’re in a high-risk zone and your current shingles are not wind-rated above 130 mph — or if they’re near the end of their service life — a re-roof with Class 4 impact-rated shingles before the season starts is the most comprehensive protection you can invest in. See our full guide to impact-resistant shingles for a breakdown of products and insurance implications.
Gutter and drainage preparation
During a hurricane, rainfall intensities can reach 10–15 inches per hour in the eye wall. Your gutters and downspouts need to be clear and capable of moving that water volume away from the foundation.
- Clean gutters thoroughly in late April or early May, before the season starts. Even a partial blockage can cause gutters to overflow and push water under the eaves.
- Install gutter guards if debris accumulation is a recurring problem. Amerimax gutter guards are an inexpensive snap-in option that significantly reduces how often cleaning is necessary.
- Extend downspouts at least 4–6 feet from the foundation. During extreme rain events, downspout discharge pooling against the foundation can cause basement and crawlspace flooding even when the roof itself is intact.
- Clear downspout strainers — the small mesh inserts at the top of downspouts can clog with debris and back up the entire gutter run.
Emergency supplies to have on hand
Even a well-prepared roof can sustain damage in a severe storm. Having emergency repair materials on hand means you can limit interior damage during the storm or immediately after, before a contractor can arrive.
Keep these on hand before season:
- Roofing tarps (heavy-duty polyethylene, at least 6 mil thick) in two or three sizes
- Roofing nails and a hammer or nail gun for emergency tarp anchoring
- Flex Seal or similar waterproof sealant for sealing small breaches around flashings
- Work gloves and non-slip footwear for any emergency roof access
- A waterproof flashlight and extra batteries
Do not get on your roof during a storm or when wind speeds exceed safe conditions. Tarps are for post-storm use after conditions have stabilized.
When a storm is approaching
Once a named storm is tracking toward your area, you have a limited window for final preparations.
- Clear all outdoor debris — loose items become projectiles that can puncture roofing and siding
- Check and secure any loose gutters or downspout extensions
- Do a final visual check from the ground for any obvious issues you may have missed
- Document your roof’s current condition with photos and video — this becomes important for any insurance claims if damage occurs
Do not attempt to make significant roof repairs when a storm is within 72 hours. Contractor availability disappears, and working conditions on roofs become dangerous as winds increase.
After the storm: what to inspect
Once the storm has passed and conditions are safe:
- Walk the perimeter of your home and look for fallen debris on the roof, missing shingle sections, and displaced flashing
- Check the attic for any new daylight penetration or active leaks
- Inspect gutters for damage or debris buildup that needs clearing
- Document all damage with photos before any cleanup or temporary repairs
- Contact your insurance company to report damage and begin the claims process — refer to our roof insurance claim guide for step-by-step guidance
Be cautious of storm-chasing contractors who appear door-to-door after a major weather event. Review our guide on how to find a reputable roofing contractor before signing anything.
The most important thing you can do right now
The highest-impact action most homeowners can take is simple: schedule a professional roof inspection before June 1. A qualified roofer can identify issues that aren’t visible from the ground, provide repair cost estimates, and flag whether your roof is approaching a point where a pre-season replacement makes more sense than a series of patches.
If your roof is more than 15 years old, has experienced hail damage, or is showing visible wear from the ground, a pre-season inspection is not optional — it’s essential. The cost of a professional inspection (typically $150–$300) is trivial compared to the cost of a post-hurricane insurance claim, which can run into tens of thousands of dollars even with coverage.
Prepare now. Hurricane season doesn’t wait.

Shingle Science Editorial Team
Independent trade-focused editorial team